Snow guards and metal roofs 101
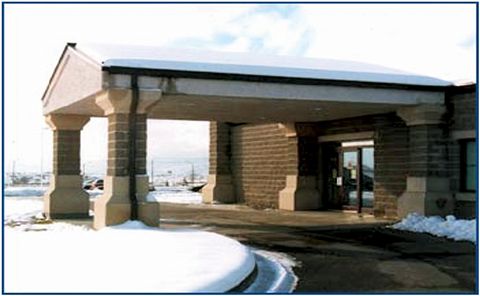
Adding a sign to the building warning pedestrians of falling ice and snow is not an acceptable alternative to snow management. It might actually create a greater issue for the building owner because the sign admits to a problem with falling snow and the owner is not taking proper remedial action to protect the public. If someone were to be hurt by falling snow it may be an invitation for a lawsuit. The addition of snow guards is a simple ‘insurance policy’ to protect the designer, owner, and public from falling snow and ice. The goal is a well-managed snow pack, maintained on the roof by snow guards, where it can be naturally melted and eliminated (Figure 3).
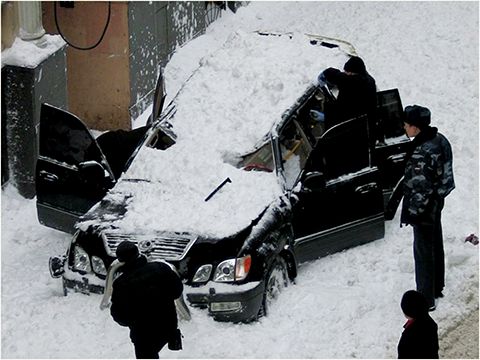
Often, it is not just people at risk from the ravages of falling ice and snow. Vehicles, mechanical equipment, and landscaping can also be in the path of rooftop avalanches (Figure 4). The volume of ice and snow quickly exiting a roof can be measured in tonnes and can cause significant damage.
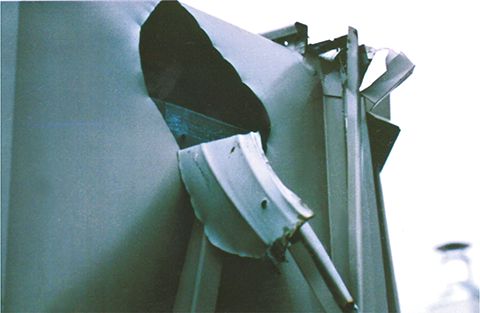
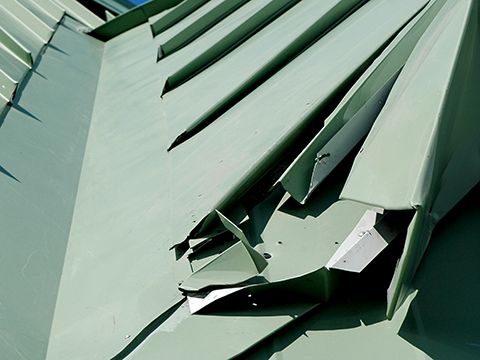
While it is clearly important to protect people and equipment, it is also important to defend the building itself from avalanching snow. Extensive rooftop damage can be caused in an instant. Gutters, fascia, trim, signage, light fixtures, antennae—anything attached to a roof—can fall prey to an avalanche of sliding ice and snow (Figure 5). Ice and snow sliding uncontrollably down a roof valley can open up seams and destroy valley flashing (Figure 6). A small investment in snow guards can protect a building owner from extensive repairs and long-term maintenance headaches.
Engineering snow guards on metal roofs
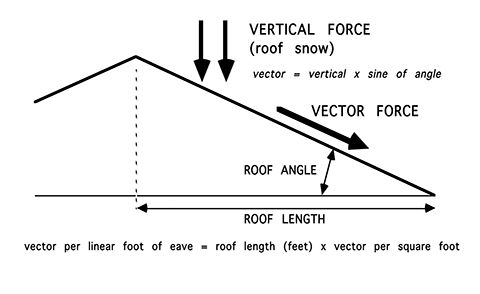
The forces of snow on a rooftop should be mathematically calculated to ensure product success. Simply stated, the calculation takes the vertical weight of the snow and reduces it by the sine of the roof angle to arrive at the angular force exerted on the snow guard.
In the case of a metal roof, the force snow guards can withstand can be calculated simply by following these steps (Figure 7):
1. Obtain the roof snow load.
2. Multiply the roof snow load by the sine of the roof angle.
3. Multiply the sum of Step 2 by the eave-to-ridge measurement of the roof.
4. Multiply the sum of Step 3 by the seam-to-seam width measurement of the roof.
The final answer is the angular force. (There are several commercially available calculators on the Internet that can walk through this process and complete the calculation.)
Once the angular force is calculated, snow guards can be chosen by consulting the published test data from the manufacturers. To determine the number of snow guard rows needed, the tested allowable load of the snow guard being considered should be divided into the angular force sum. For example:
1. If angular force equals 461 kg (1016 lb), and a cleat snow guard device with the tested allowable load of 125 kg
(470 lb) has been chosen, four rows of these parts per seam will be needed to withstand the angular force (125/461=3.68, or ‘4’).
2. If angular force equals 461 kg (1016 lb), and a fence-type snow guard device with a tested allowable load of 476 kg (1050 lb) has been chosen, only one row of this type of device would be needed to withstand the angular force (476/461=.968, or ‘1’).
It is very important to understand snow guard systems must be load-to-failure-tested on specific roof manufactures and product profiles by a third-party-certified independent laboratory for the guards to properly perform in different environments and roof systems. This data must be part of the submittal package provided by the roofing contractor planning the snow guard system, and must be specified as such.
If a snow guard submitted by a roofing contractor has not been tested, or the data is not included, it should not be used. An untested system is merely a wild guess by the roofing contractor and will probably fail.
If a snow guard system is planned with multiple rows, their placement is critical for success. It is generally accepted all rows of snow guards should be placed on the lower half of the roof surface. The first row of snow guards is most often placed approximately 300 mm (12 in.) from the eave edge of the roof. This placement accomplishes two objectives. First, it minimizes the uncontrolled snow shed below the snow guard to 304 mm. Second, it engages the roof snow pack down low in the eave to ridge dimension where it is most dense, maximizing the guard’s holding capacity.
With fence-type snow guards, when a second row is required (see calculation process above), it is most often placed approximately 20 per cent of the eave to ridge distance and a minimum of 1.9 m (6 ft) from the first row of snow guards. (This distance will vary based on the actual eave to ridge distance of the roof.) If a third row of snow guards is required, it is most often placed approximately 40 per cent of the eave to ridge distance and spaced similarly as the first two rows. In any event, the objective is to place the rows evenly and esthetically, while keeping them in the lower half of the roof surface to engage the snow pack in its densest concentration [See Metal Roof Designs for Cold Climates.]
Sign up for our weekly newsletter
Construction Canada weekly newsletters give the latest AEC industry news for those who build, design, engineer, specify, renovate or operate in the built environment.
Related Products & Services

Read the Latest Issue