Guest column: Lazy construction has disastrous results
By Brian Shedden, BSSO
What are the main problems relating to the state of wood-framed construction in Canada?
All over the country, I am seeing restorations—which, traditionally, have been reserved for either replacing components that have reached the end of their service or for a simple ‘face-lift’—for buildings less than 10 years of age.
In my hands-on role as principal at an engineering firm, I spend most of my time investigating building envelope failures in relatively new buildings. More and more often, property owners have to restore buildings which were built using new materials and technologies, based on designs that complied with current building codes. This is because improperly constructed building envelope assemblies often lead to massive structural failures.
A mess of a site
In 2013, my firm was called to a complex with more than 40 high-end, townhouse-style condominiums in Alberta, with units which had originally been sold for approximately $1.5 million each. The buildings had been constructed from 2007 to 2009, so this was a fairly new build. However, residents were already reporting issues of top-floor leaking to building management.
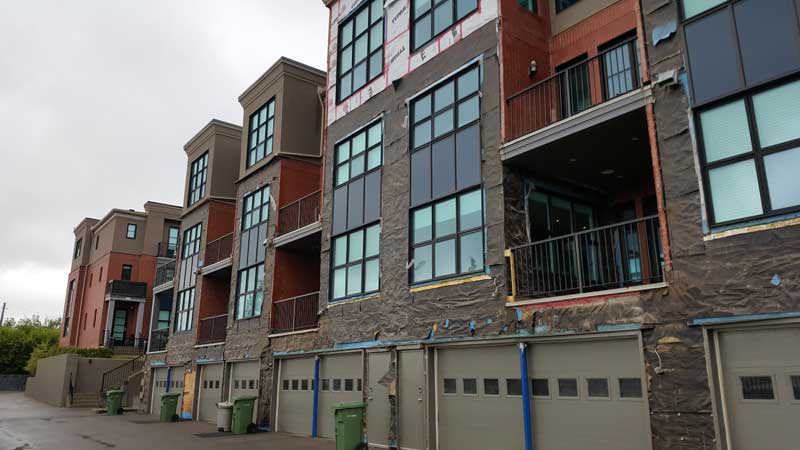
Before beginning my site review, I stood across the street from the site and noted the appearance of the buildings. There was evidence of ice dams—I could see the ice hanging out over the soffits and eaves—but something else concerned me: the homes were not level. They appeared to be slightly bowing.
Once I reviewed the condominium’s attic space, additional issues became apparent:
- While the roofs had vented, aluminum soffits, these installations were not able to perform their “air-supply” role due to being either plugged with insulation or covered with plywood from above.
- The firewalls between the townhouse units had never been sealed. They had water stains running down the sides of the open joints.
- A layer of dust atop the insulated ducts running through the attic space was decorated with spots, caused by dripping water that had condensed and fallen from the protruding roof nails above.
- The installed polyethylene vapour barrier not been sealed to the pot-lights penetrating the top-floor ceiling.
I determined the ice damming was a direct result of too much warm, moist air escaping into the attic space and that the blocked soffit vents had prevented the natural convection air-flow. This warm air melted the snow on the rooftop and the water froze again as it moved toward the cold outer edge of the roof. Without adequate convective ventilation where warm air rises to the top and escapes to the exterior while drawing in cool, dry air from the lower soffit areas, I could seal the vapour barrier, but I knew the ventilation problem would pose a challenge.
As the roofs only had 102 mm (4 in.) soffits and only a 3/12 pitch, there was no easy way to introduce soffit ventilation from either the interior of the attic space or from below the overhangs. We needed to remove a 1.2 m (4 ft) strip of roof deck sheathing from the entire perimeter of the rooftops to open blocked vents and install insulation baffles to keep the insulation from plugging up the ventilation. This ended up costing approximately $400,000 in roofing, ventilation, sealing, and firewall repairs—nearly $10,000 per unit.
While working on this challenge, the condo board of directors asked my team to complete a full condition assessment of the rest of the site. The first step was to perform an extensive visual assessment to determine what symptoms are present that might point to underlying issues. In my experience, the perfect time to do this kind of work is in the rain. These conditions provide inspectors with a free water-test, which can help locate all of the potential weak points in the building envelope.
When performing the visual assessment, my team observed many alarming issues, including:
- staining at the balcony columns;
- drip patterns at windows with no flashing;
- little evidence of sealants;
- overflowing eavestroughs;
- step cracks throughout the field of the brick veneer masonry;
- cladding in direct contact with the ground; and
- panels of masonry leaning away from the building.
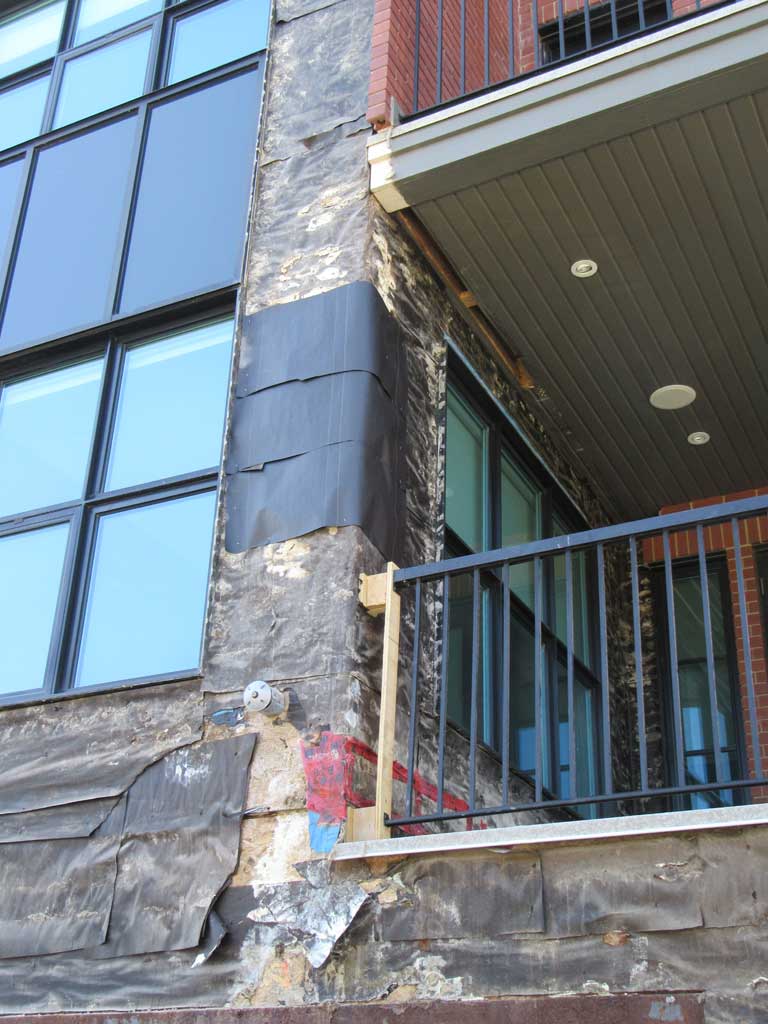
Having identified some areas of concern, we then began a round of exploratory dismantlement. We cut into the brick veneer and found reverse lapped building paper and membranes. We cut into the supposed stucco and found 25 mm (1 in.) thick expanded polystyrene foam insulation with only a finish coat of cementitious material installed. We opened corners at windows and found reversed lapped membranes and broken miter joints on the window frames themselves. We opened sections of the stained columns and found severe structural decay. Finally, we opened the drywall in the garage ceilings and found grossly under-sized main structural beams.
With the undersized main beams threatening occupancy, we had to emergency shore each unit.
The extensive problems with the building envelope required a complete re-cladding of the site. After design and competitive tendering, the repairs were estimated at about $7 million—roughly $165,000 per unit, plus $10,000 in roof repairs. In addition to the costs, property values were quickly dropping to about 50 per cent of what homeowners had paid to purchase the units five years earlier.
Significant re-construction
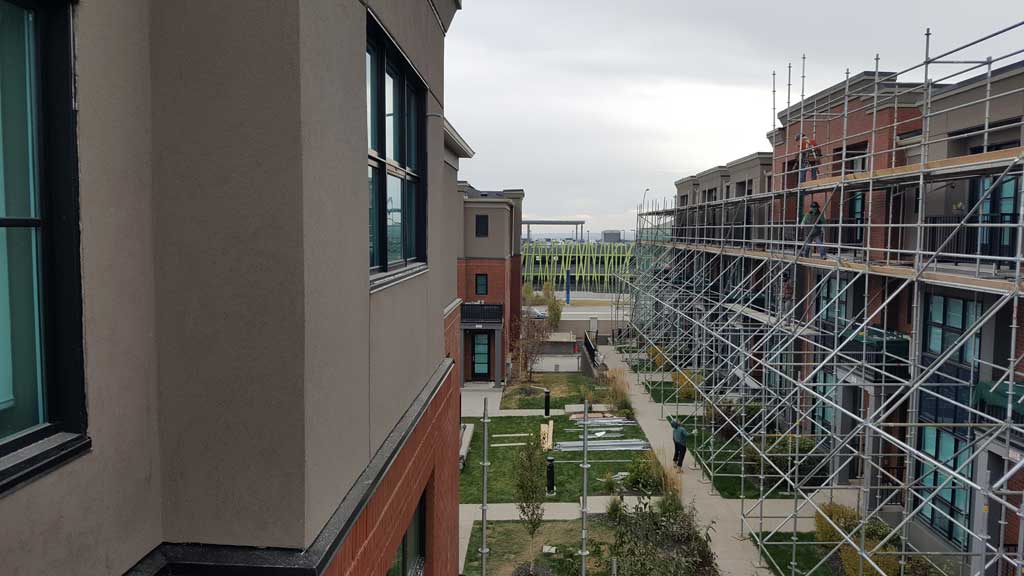
We began re-construction work in the spring of 2016. The entire site was enclosed and protected with scaffolding. Upwards of 100 tradespersons were onsite every day. My team and I provided daily site review services and contract administration.
As the demolition phase commenced, it became apparent the issue of decay was far more widespread than initially considered. Columns of three-ply 51 x 152 mm (2 x 6 in.) studs that were only a few years old had decayed to the point where you could literally poke your finger through them. Additionally, widespread areas of sheathing had decayed to the point of total deterioration.
When it came to removal of the brick veneer, large panels were found to be only anchored by a few brick ties, while other areas had way too many. As for the faux stucco, the through-wall flashing was simply a dummy; there was no through-wall installation.
The racking in the structure, which had resulted in the breaking of the window frame joints, was the most challenging aspect of the project. We had to carry out interior shoring and replacement of the major beams all while the units were fully occupied.
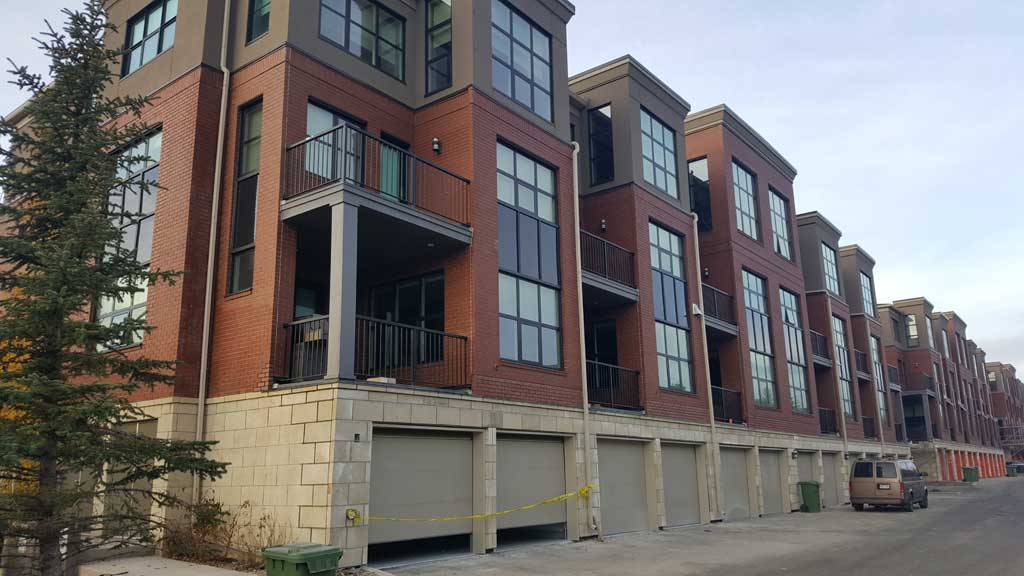
For the re-construction and re-cladding, a new moisture and air barrier was applied to the entire shell. New windows were flashed in, following repeated mock-up attempts to get the process right. A drained exterior insulation and finish system (EIFS) was installed, as well as new brick veneer masonry structural columns, sheathing, balconies, garage doors, and eavestroughs.
We finished construction in November 2016. All-in-all, the job took eight months.
The original jobsite appeared to have the markers of responsible craftsmanship. The required paperwork was stamped by engineers. A foreman oversaw construction. City inspections were performed and architectural certificates were issued. Everything appeared to have been done properly and to code—on paper. In reality, it was apparent corners were cut and risks were taken to minimize construction costs.
 Brian Shedden, BSSO, is a principal in the existing buildings group at Entuitive Corporation in Calgary. He has more than three decades of experience in the building construction and restoration industry. Shedden is a past-president of the Ontario Building Envelope Council (OBEC), past-director of Canadian Condominium Institute (CCI), presenter at The Buildings Show, and recognized as a leading expert in the field of building science. He can be contacted via e-mail at brian.shedden@entuitive.com.
The specified slider id does not exist.
Sign up for our weekly newsletter
Construction Canada weekly newsletters give the latest AEC industry news for those who build, design, engineer, specify, renovate or operate in the built environment.
Popular Articles
-
1
-
2
-
3
-
4
-
5
Read the Latest Issue