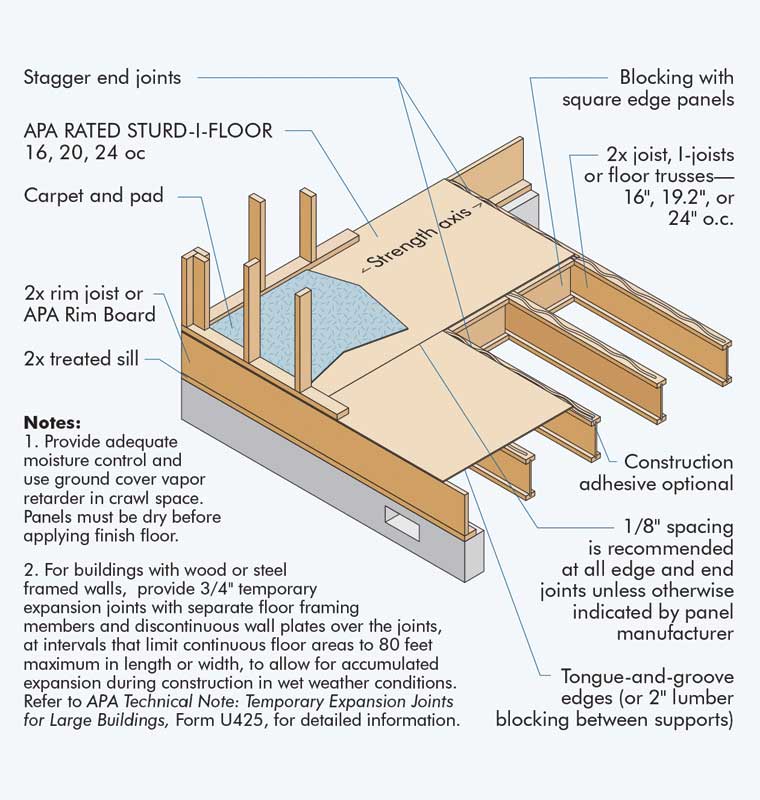
Better floor performance starts with a solid subfloor system
Glue-nailed subfloor panels up to 19 mm (3/4 in.) thick should be fastened with 63-mm (2 1/2-in.) common nails, 50-mm (2-in.) ring-thread nails, or screws spaced 150 mm (6 in.) o.c. along panel edges and 300 mm (12 in.) o.c. along intermediate supports. For subfloor panels thicker than 19 mm, and for nailed-only subfloor installation, it is recommended to check APA’s Engineered Wood Construction Guide (Form E30) for fastener size and spacing recommendations.
It is advisable to only employ adhesives conforming to ASTM D3498, Adhesives for Field-gluing Plywood to Lumber Framing for Floor Systems, or APA specification AFG-01, Adhesives for Field-gluing Plywood to Wood Framing, with a glued-floor system. If OSB panels with sealed surfaces and edges are to be used, one must only employ solvent-based glues. (It is important to check with the panel manufacturer and always follow its specific installation recommendations.)
Preparation of subfloors for installation of wood flooring
Both the subfloor and hardwood flooring are sensitive to moisture. Most hardwood flooring is delivered with a moisture content of less than 10 per cent. If installed over a subfloor with high moisture content, expansion and buckling of the hardwood flooring may occur as it absorbs moisture from the subfloor. Once the hardwood flooring loses some of the excess moisture it can lead to gaps between hardwood flooring boards along the tongue-and-groove joints, ultimately leading to squeaks or noisy floors. This reaction to moisture can occur regardless of the panel type used for the subfloor.
If the subfloor has become wet during construction, it should be allowed to dry prior to the installation of hardwood flooring. A hand-held moisture meter can be used to check the condition of the subfloor and levels should be within a range that is consistent with recommendations of the hardwood flooring manufacturer. Moisture content measurement results will vary depending on the panel and meter type. To ensure accurate results, it is important the moisture meter be calibrated before use. Calibration should be conducted in accordance with the equipment manufacturer’s recommendations.
The National Wood Flooring Association (NWFA) recommends that the moisture content differential between the flooring and the subfloor sheathing be no more than two per cent in boards 76 mm (3 in.) and wider and no more than four per cent with narrower flooring boards.
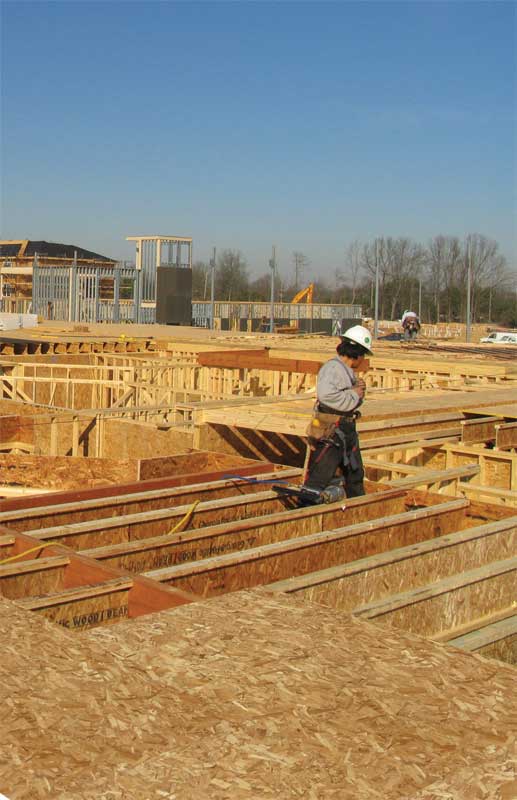
For homes with crawlspace floors, the builder should ensure the space is well drained, ventilated, and dried before hardwood flooring is installed. Additionally, a 6-mil polyethylene (PE) vapour retarder should be installed with seams tapered over the ground in the crawlspace before the area can begin to adequately dry and prior to installation of the hardwood flooring.
It is advisable to inspect the subfloor for flatness. When necessary, the builder may need to install extra blocking or fasteners to flatten uneven areas. The subfloor must be checked for squeaks or loose panels and refastened as necessary before the installation of the hardwood flooring.
The subfloor should also be checked for smoothness along joints between panels. Any ridges at panel ends or edges should be sanded smooth prior to installation of the hardwood flooring. Most flooring manufacturers require the subfloor to be flat within 3 mm in a 2-m (6-ft) radius or within 6 mm (1/4 in.) in a 2.4-mm (8-ft) radius.
Hardwood flooring installation
It is best to follow the recommendations of NWFA for handling, storing, acclimatizing, and installing hardwood flooring. Where possible, hardwood flooring boards should be oriented perpendicular to floor framing for maximum stiffness. APA, in co-operation with NWFA, has created the following checklist for floor installers to ensure the long-term performance of the system.
Floor installer’s checklist
- Be sure to have a vapour barrier membrane in place on the crawlspace ground and ventilate/condition the space or basement prior to wood floor installation.
- Consider methods to remove excessive moisture from the framing/floor sheathing and the rest of the interior of the building prior to installing the flooring (such as using an auxiliary dehumidifier in the short term).
- Follow the recommended fastener schedule or consider augmenting the attachment by spacing the fasteners at closer intervals.
- Make sure the length and diameter of the flooring fasteners meet or exceed flooring industry or the manufacturer’s recommendations. Manufacturers typically recommend a minimum length of fastener. The greater the length of the fasteners’ embedment in the wood subfloor and/or the larger the shank diameter of the fasteners, the greater the fastener withdrawal capacity.
- The recommendation for fastening of flooring boards is often within 25 to 76 mm (1 to 3 in.) of end joints. Keeping fasteners within 25 to 50 mm of end joints will better stabilize movement.
- Consider using approved adhesive in conjunction with the recommended fastener schedule for flooring being installed with a liquid vapour retarding system to control moisture migration.
- In some situations, it may be necessary to build in expansion rows within the flooring system. This may include gaps within the floor, T-moulding transitions, cork, or other methods.
Sign up for our weekly newsletter
Construction Canada weekly newsletters give the latest AEC industry news for those who build, design, engineer, specify, renovate or operate in the built environment.
Products & Services


Read the Latest Issue