
By Steven Fechino
Flashing must not be taken for granted, as one can only get away with so much before leaking walls destroy a reputation and a completed project.
In the 1980s, flashing was typically a thin copper membrane with brown paper and tar sandwiched together to which masons used to add a bit of mastic. Professionals in the field anchored the flashing in the backup wall, typically a concrete masonry unit (CMU) substrate. Masons would lay the edge of the flashing in the bed joint of the CMU coursing, and it would be held in place once the mortar between units set.
In 1989, masonry professionals were introduced to end dams and drip edges. Prior to that, flashings were often cut to fit the face of the wall with a trowel—an irregular, jagged cut that could allow water to flow back into the wall. The flashing was often placed in the block work before the brick, creating the need for trimming once the brickwork started, and it had to be cut to be somewhat even with the face of the wall.
Flashing components are as important as the membrane is to the whole system when it comes to keeping the building dry. Flashing cannot be installed somewhat correctly; it has to be precise. The money and time it takes to ‘re-do’ flashing is straight out of the contractor’s pocket.
Components
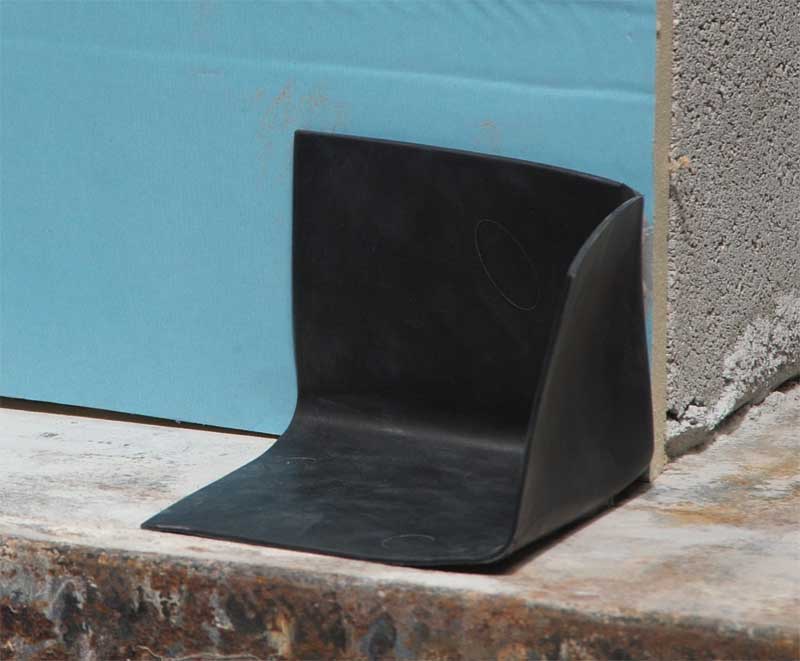
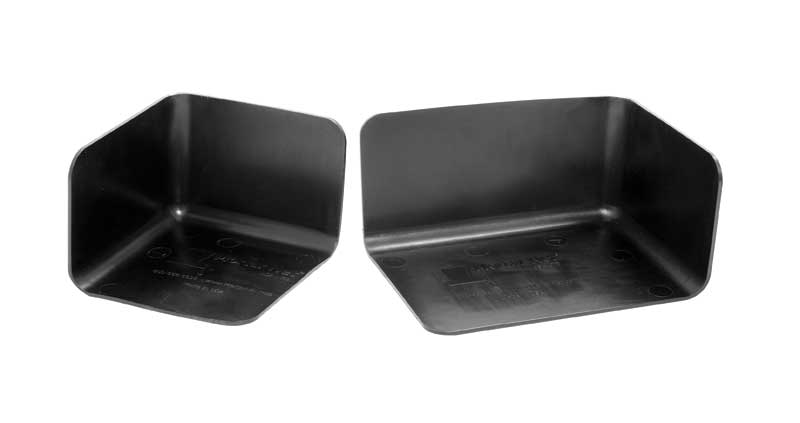
End dams were seen as new back in the 1980s. They were added to the flashing system and seemed to have a purpose. The current practice of using prefabricated components is not the only way to flash a building. However, in some cases, they can give installers with less training the same ability to flash a building as more experienced mechanics.
One can pull and fold an end dam, but this can easily be installed upside down, thereby creating a leak. Another method is to pull the end of the flashing and place it in the head joint, once it is trimmed. However, this too can sag out of place, creating a leak. The solution is to use a prefabricated end dam. In the author’s experience, the cost of using the proper component is comparable to the pulling or folding method.
In all flashing termination methods discussed above—where the flashing is tucked or the end dam is made from a scrap piece of flashing—the actual flashing creates the termination. When using an end dam, figuring the flashing length becomes quick and simple. If the window rough opening is 2.44 m (8 ft), one would use 2.74 m (9 ft) of flashing, grab two end dams, term-bar, anchors, and some sealant. This way there would be 0.15 m (0.5 ft) of bearing on both sides; the end dam will be long enough to bond to the flashing and fill the required head joint by sliding the end dam out a little bit. It is quick and requires less thought than creating an end dam or pulling and tucking the flashing. Time is money, and since labour is expensive, every decision to make improvements helps the bottom line.
It has been said by bricklayers the amount of water collecting on the flashing is minimal, and it is best to let it fall off the ends of the flashing because it will dissipate in the cavity and not cause any problems. It may work once or twice, but this practice is unsustainable. In the author’s experience, it is not recommended to do a flashing on a house without an end dam.


