A primer on examining brick masonry
By Paul Potts
Often enduring more than a hundred years, brick masonry is testimony to the traditional collaboration between architect, engineer, and mason. Beauty and historical significance are often the most compelling features of brickwork, but focusing only on this rich appearance and permanence oversimplifies the engineering knowledge, design requirements, and workmanship needed to arrive at a result that is not only beautiful and enduring, but also structurally sound and a defense against the elements. (This article is intended as a guide for inspection and not a handbook for designing or constructing masonry. Its contents are the result of the author’s experience and research on the issues of masonry inspection. Architects’ and engineers’ specifications and building codes take precedence over anything stated in this article. Further, this author has not included discussions of engineering issues that are the basis of masonry structural design or concrete masonry unit (CMU) construction.)
This article discusses developing a working relationship with the mason, construction practices, design details, material properties, and workmanship issues basic to successful brick masonry construction. With the information presented in this article, the architect’s construction administrator (CA) or independent inspector will be better able to examine and report on the brickwork, enforce the requirements of the plans and specifications, and prepare representative reports while communicating confidently with the mason.
Getting acquainted at the progress meeting
Before and after the weekly progress meeting (which takes place away from the distractions of construction activities with a full set of construction documents available) is the ideal opportunity for developing rapport with the masonry superintendent. The superintendent can easily bring the CA or inspector up to speed on the current progress of the work, but it is important to keep in mind this requires a willingness to be helpful—the result of a harmonious, and not contentious, relationship.
During the progress meeting, the construction administrator should be taking notes and listening for the ‘narrative’ (or gossip, if you will) that has developed around the jobsite. The owner is influenced by this gossip, and the CA will show better client management skills if they are on top of it.
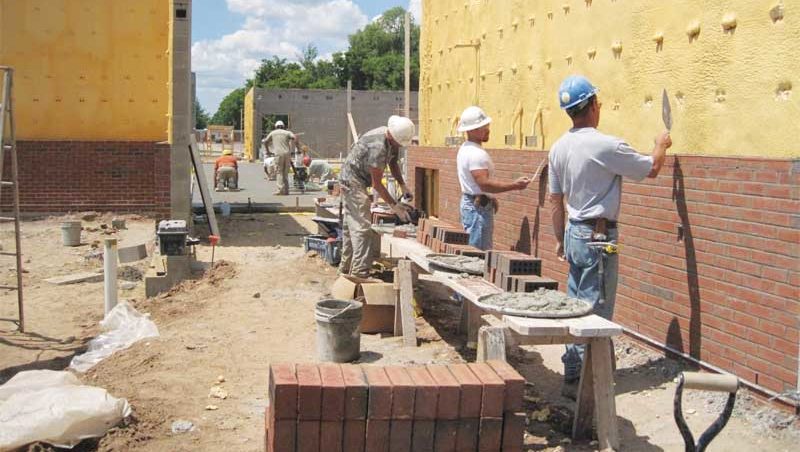
Masonry construction practices
Some issues can be observed while walking the site. These include ensuring all bagged products and brick, mortar, and concrete masonry units (CMUs) are protected from the weather to prevent wetting of the materials, and that only non-chloride admixtures are being used in mortar or grout.
Masons should not drop mortar into the void behind the brickwork, as it piles up on the masonry ties and plugs up the drainage material. They should not attempt to cut off mortar fins protruding into the cavity; instead, they should minimize the excess mortar squeezed out of the bed joint by bevelling the mortar away from the space behind the brick.
Brick movement joints should be kept free of mortar, and horizontal reinforcement should be stopped on either side of the joint. Brick Industry Association (BIA) Technical Bulletin 18A, Accommodating Expansion of Brickwork, provides a good discussion of expansion joint construction. The tops of masonry must be covered when not being worked on to prevent rain and snow from getting into the cores. Additionally, the sharp corners of the extended metal drip flashing should be flattened to protect the public.
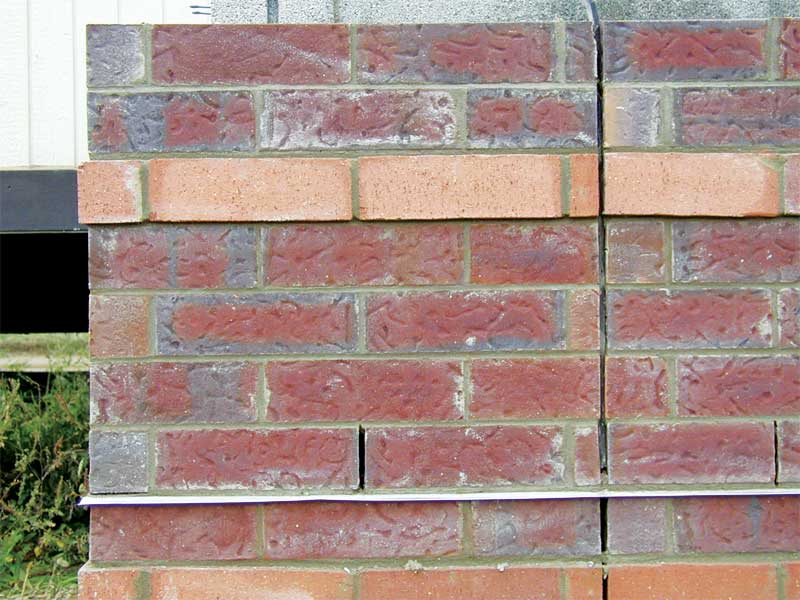
Some mortar additives put a shading on the mortar. For this reason, masons must be careful of where they stop and start adding it. Mortar should be used consistently in each elevation so the shading does not start or stop in the middle of an elevation.
Weep joints and rainscreen wall design
Head-joint weeps and through-wall flashing are a part of the traditional masonry drainage wall system. Weep openings provide a pathway for water to drain out of the cavity and should be in the first course of brick on the through-wall flashing. Head-joint weeps must be raked clear of mortar down to the flashing, and be kept free of mortar droppings to provide an unobstructed path for water to drain. They are essential for brick veneer or cavity wall masonry, and should be discussed with the architect-engineer if not shown on the drawings.
In addition to this traditional drainage wall system, a pressure-equalized rainscreen wall design incorporates air vents at the top and bottom of the exterior wall to circulate water vapor out of the cavity and minimize water infiltration. Without these air vents, suction in the cavity (created by high-velocity wind hitting the exterior of the brick) draws moisture from the outside face into the cavity, through breaches in the mortar joint. Venting, provided by the pressure-equalized rainscreen wall design, reduces cavity suction by equalizing air pressure inside and outside the brick wythe. Vents should be at the top and bottom of the cavity, below any parapet or brick ledge that compartmentalizes any portion of the cavity and three courses above the flashing. For an in-depth discussion of the rainscreen wall principle, refer to Canadian Building Digest 40 (CBD-40), Rain Penetration and Its Control, and BIA Technical Note 27, Brick Masonry Rainscreen Walls.
Sign up for our weekly newsletter
Construction Canada weekly newsletters give the latest AEC industry news for those who build, design, engineer, specify, renovate or operate in the built environment.
Products & Services
Read the Latest Issue